|
The Bar Tab feature allows you to assign products to customer tabs, view open or closed tabs, and process payments.
This section explains how to create, manage, and pay off bar tabs within BoothPoint.

🧭 Assigning Products to a Bar Tab
📋 Steps
-
Select product(s) from the POS screen.
-
Tap or click the Add to Bar Tab icon.
-
Choose an existing bar tab or create a new one.
|

|
Tip
When creating a new bar tab, enter a Tab Name (Reference) such as John Smith or VIP Table 3 and press Save. This name will appear in the Open Bar Tabs list for easy identification.
|
🔍 Inquiring on Existing Bar Tabs
📋 Steps
-
Tap or click the Bar Tab Question icon.
-
Select the Bar Tab you wish to view.
-
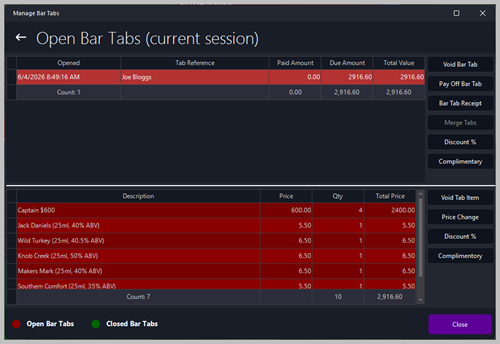
The Open Bar Tabs screen displays all active tabs for the current session.
🧾 Details Displayed
-
Opened — Date and time the tab was created
-
Tab Reference — Customer or table name
-
Paid Amount — Amount already paid
-
Due Amount — Remaining balance
-
Total Value — Total of all items on the tab
|
|
Tip
The lower section lists all items assigned to the selected tab, including description, price, quantity, and total price.
|
💰 Paying Off an Existing Bar Tab
📋 Steps
-
Tap or click the Cart icon with cash image.
-
Select the Bar Tab to pay off.
-
Choose the payment method (e.g., Cash, Credit Card, Funny Money) and complete the transaction.
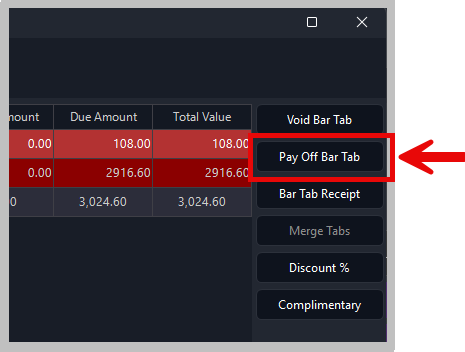
⚙️ Additional Options
-
Void Bar Tab — Cancels the entire tab.
-
Pay Off Bar Tab — Processes full payment.
-
Bar Tab Receipt — Prints or previews the receipt.
-
Merge Tabs — Combines multiple tabs into one.
-
Discount % / Complimentary — Apply discounts or complimentary items.
|
|
Tip
Use clear tab names and references to make managing multiple tabs easier during busy sessions.
|
| ⚙️ |
Best Practice
Always record the staff name, terminal ID, and lift amount to ensure full accountability and traceability in end‑of‑day reports.
|
|